Using Rye Grain – Product Guide

Using rye grain for mushroom spawn
If you haven’t tried using rye grain to make your own mushroom grain spawn before, you might find this simple ‘how to’ guide useful. For the benefit of those new to mushroom cultivation, we’ve also outlined some of the basic vocabulary you might want to understand.
Like all things relating to growing mushrooms, using rye grain to make your own mushroom grain spawn requires you to follow strict sterile working and handling practices in order to avoid unwanted contamination. Patience and methodical working is essential when cultivating mushrooms at home. Spending a few minutes learning in advance what you need to do at each stage, plus developing sterile working techniques, will always pay off in the long run.
Useful Vocabulary
Inoculation
Inoculation refers to the process of injecting your rye with an inoculate such as liquid culture, which you can think of as ‘seeding’ the rye with live mycelium.
Mycelium
Mycelium is what mushrooms grow from and tends to look a bit like white mould as it grows and colonises your rye grain. Mycelium for most mushroom types is supplied as liquid culture syringes.
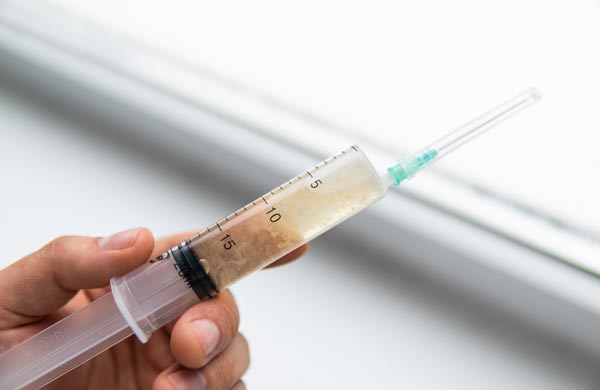
Liquid Culture Syringes
Liquid culture syringes which contain live mycelium in a nutrient solution are usually the best way to inoculate rye grain and are readily available online.
Spore Syringes
Spore syringes are an alternative to liquid culture syringes but we always advise against their use due to much slower colonisation and a higher risk of unwanted contamination.
Colonisation
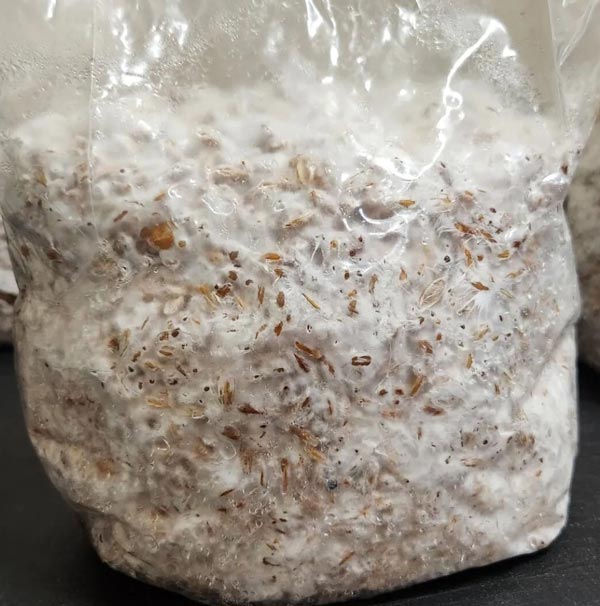
When mycelium is added to a suitable food source such as rye grain, it slowly grows and colonises it. In practical terms, healthy white live mycelium will gradually spread, covering the rye grain until it looks like a solid white block of fungi. This is what we mean by colonisation.
What is mushroom grain spawn?
 Mushroom grain spawn is one of the basic building blocks in mushroom cultivation. Fully colonised grain spawn consists of sterilized grain, usually rye, millet or wheat, which has been inoculated (for example with liquid culture) and has been fully colonised with mycelium.
Once live mycelium has been added to the sterilised grain it spreads and builds a network of fungal cells that colonizes all the grain, eventually resulting in the grain resembling a large white fungi-covered block. These colonised grains act as a form of seed source for mushroom growth when mixed with a suitable substrate.
Mycelium is what mushrooms grow from and can be thought of as both a form of ‘seed’ and also as roots of a mushroom.
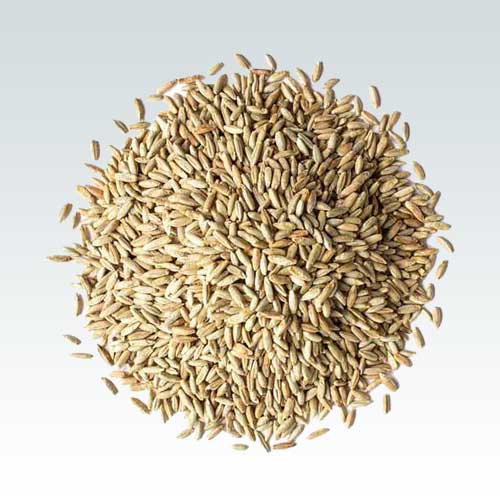
Experienced growers may use different types of grain based on their personal preferences and experience of the type of mushrooms they grow. However, it’s generally accepted that rye is the gold standard for grain spawn. Rye grain boasts excellent water absorption capability, provides optimal nutrient types and levels, and is compatibile with most mushroom species. That said, other types of grain can be used in much the same way, such as wheat, barley, brown rice, millet, and sorghum.
Using Rye Grain – Delivery Checks
Our rye grain packs are fully sterilised – which means the grain is sterile and contains no contamination. Please check the grain to confirm this. We advise customers to set aside fresh deliveries of rye grain for a week after delivery, leaving them in a cool location away from sunlight. This wait allows you to confirm the grain’s sterility, as any contamination will be visible 3-7 days after occurring. This knowledge will help you to trace where any subsequent contamination that may occur comes from.
The vast majority of contamination, if not all, is caused by lapses in sterile working practices, contaminated inoculate syringes (or needles), incorrect handling or unsuitable environmental conditions. Keeping a simple log of everything you do should allow you to trace when any contamination was introduced. Note that we do not provide replacement bags or refunds for grain that has been inoculated, so these checks are most definitely in your best interests.
Using Rye Grain – Inoculation
When we speak about inoculating grain we are referring to the process you might think of as ‘seeding’ the grain by adding an inoculate material in the form of live mycelium from a liquid culture syringe. Using liquid culture is generally the most common way of inoculating grain, along with grain-to-grain inoculation.
You will need:
A bag of sterilised rye grain
A liquid culture syringe containing live mycelium
70% isopropyl alcohol or sterile alcohol wipes
A flame source for needle sterilisation if reusing a needle
Inoculation Steps:
 Step One: You must work in a sterile environment. If you have a laminar flow hood then you’re way ahead of the game, but their cost means that most growers use a form of ‘still air box’. A still air box is basically one of the large transparent storage boxes found in many stores, turned upside down (with the lid on) and arm holes cut into the sides. Clean the insides of the box with 70% alcohol, place the items you plan to use inside the box and then leave the air inside to settle for an hour or so. When you are ready to start work, try to reduce your movements (especially arms in and out of the box) to a minimum and clean the items inside the box with alcohol again.
Step Two: If you are using a liquid culture syringe for the first time, the needle will probably be in sealed sterile packing, in which case attach it to the syringe inside your still air box. Shake the syringe gently to distribute the mycelium evenly before injecting. Use an alcohol wipe to clean the surface of your bag’s injection port, then inject your liquid culture into the rye, moving the syringe around to help spread the liquid as widely as possible. The amount of liquid culture you should inject depends on many factors, such as the amount of rye in the bag, strength of liquid culture and the speed you want it to develop at, but as a general rule you might try 3ml – 5ml per Kg of rye. Experience will help you judge the correct amount – just know that injecting too much liquid can create contamination through excess liquid. When you’re finished, it is a good idea to take a small strip of micropore tape and use it to cover the injection port.
Step Three: If you’re inoculating more than one bag, or if you’re using a previously used needle, hold the needle over a heat source until the needle is glowing red hot, to kill any potential contaminants prior to use. A fresh sterile wipe can be used to cool the needle – don’t stick a red-hot needle into the bag or injection port as it will leave a permanently open hole – a convenient entrance point for contaminants!
Using Rye Grain – Incubation
Once you have inoculated your rye grain with live mycelium, the next step is the slowest part of the process – incubation. Your bag of inoculated rye needs to be stored in suitable conditions while the mycelium germinates and colonises the grain. This process can take several weeks and the grain needs to be left alone while it occurs.
 Find a location where your grain will remain undisturbed out of direct sunlight, ideally in a dark or shady location. During incubation your rye needs to be kept at a steady temperature range, usually between 24-29°C depending on the mushroom species being grown.
Proper airflow should be ensured during the incubation process to prevent the build-up of carbon dioxide and to supply fresh oxygen to the grain. Again, bags which have built-in air filters will generally self-manage, but you need to ensure there is an open pathway between the air filter and the grain inside the bag – you don’t need to try to suck air in, just make sure it has a pathway it can follow.
Incubation time can vary depending on many factors including volume of liquid culture used, temperature, humidity, mushroom species and more, but in most cases you’ll see widespread colonisation after 14-21 days. Once the majority of the grain is colonised and without opening the bag, you can use your hands to gently break up the now clumped-together colonised grain and mix it with uncolonised grain to speed up the process and ensure all the grain is colonised. You should normally only do this once.
When all the rye in your grain bag has been colonised, you’ll end up with what seems to be a solid white block. At this stage you could say the process is complete but it won’t hurt to leave the bag for another couple of days, just to ensure that the centre of the block which you can’t see is fully colonised.
How to use colonised grain spawn
Once your rye grain has been fully colonised, it’s ready to be mixed with a bulk substrate, but that’s another topic. As a general guide you may find our product guide on using colonised grain spawn (really intended for users of the grain spawn we supply) useful and you’ll find it here: https://mushroomkits.co.uk/product-guides/using-grain-spawn-packs/